Craft
Digital Figure Sculpting — Week One
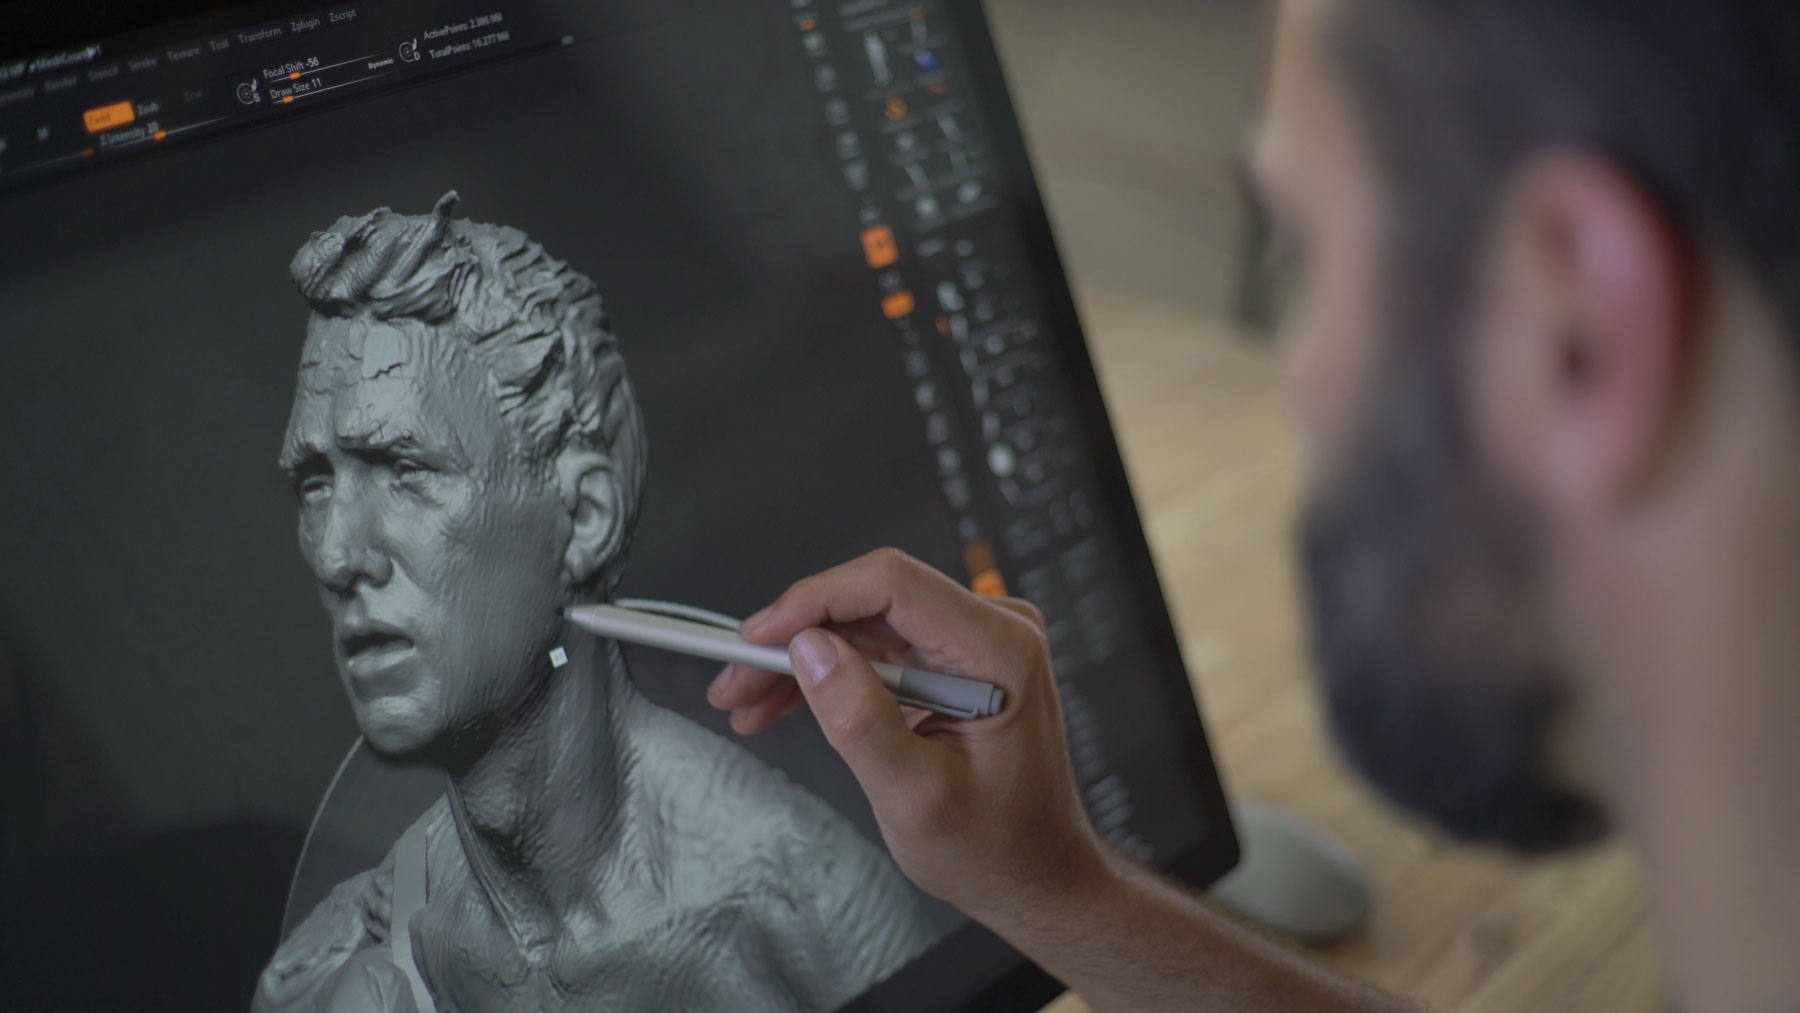
These are the notes for Week One of Digital Figure Sculpting — pulled from history, and some built just for this class. They’re meant to help with the thinking behind the figure more than the step-by-step. Enjoy.
What you need before day one
Software. ZBrush or Blender — either one handles everything we do.
A tablet. Two kinds, and both are fine for sculpting — what matters most is size.
A pen tablet (no screen): get a 9×12. The larger surface pulls your whole arm into the motion instead of just your wrist — which is exactly what figure work wants.
A pen display you draw directly on, like a Cintiq: I use a Cintiq 32“, but I’ve worked on Huion and XP-Pen too, and all of them are great for sculpting. Get the largest one your space can hold.
Proportion
Forget centimetres. The head is the one ruler you always have — it works at any size, on any body.
Instead of measuring in inches, artists ask a simpler question: how many heads tall is this person, and where do the landmarks fall? The head travels with the figure, so it scales with your work automatically.
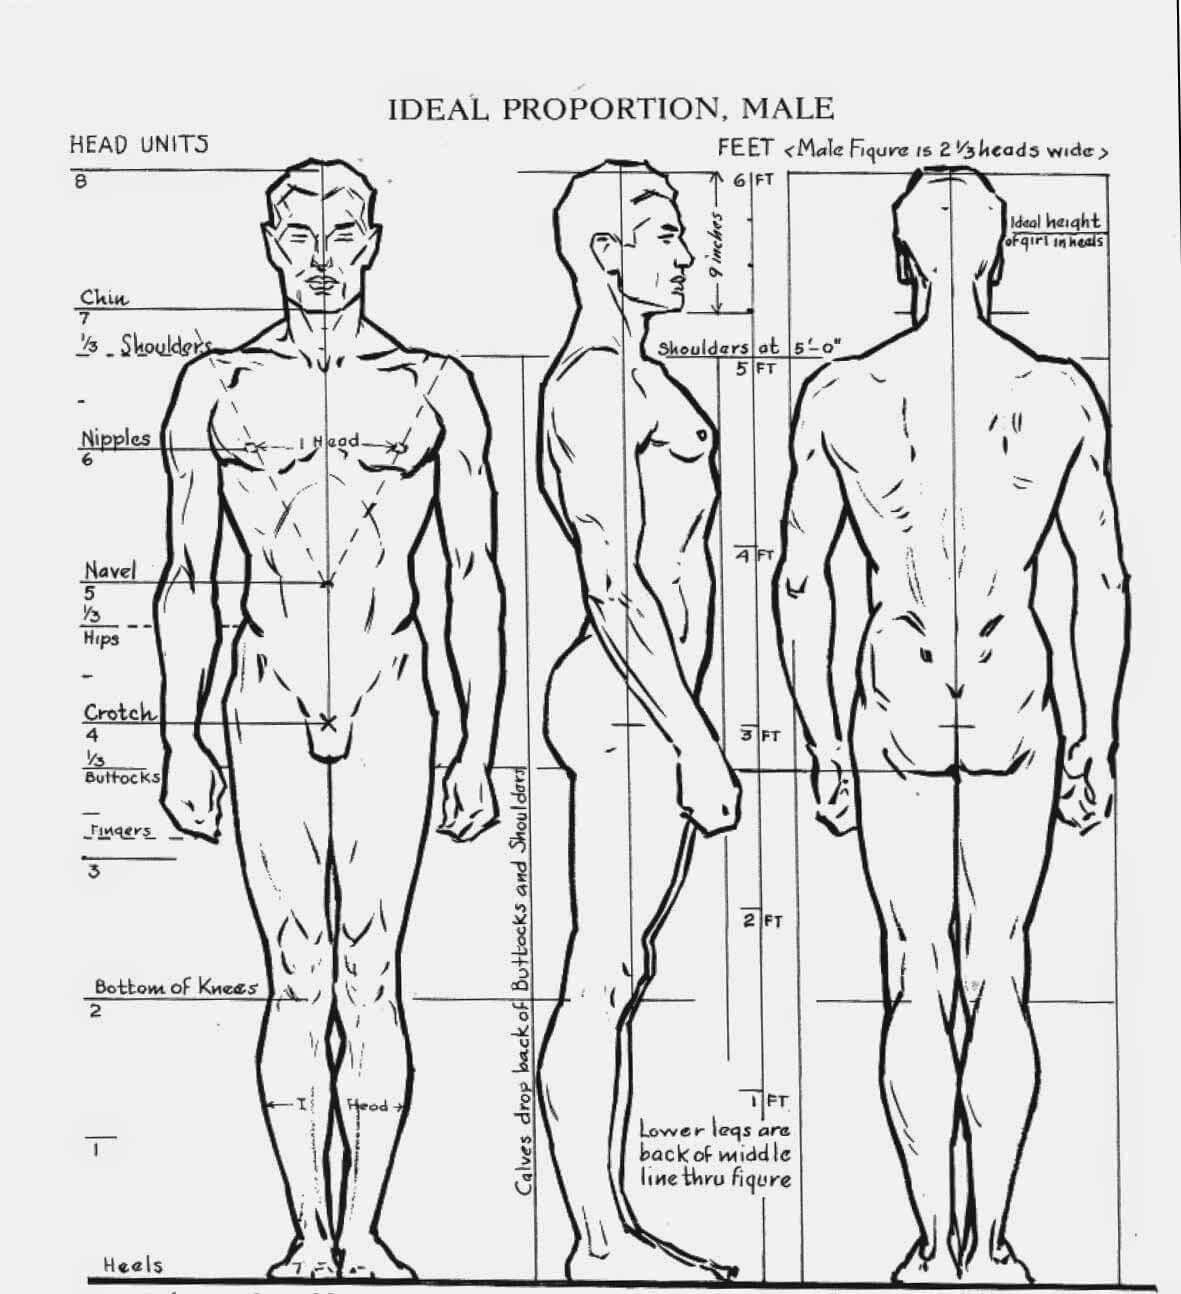
We teach the eight-head canon first because the landmarks fall on whole divisions and it is easy to hold in memory. A realistic adult runs closer to seven-and-a-half heads; stylised and fashion figures stretch to eight-and-a-half or nine. Reality is a deviation from the canon, not the other way around.
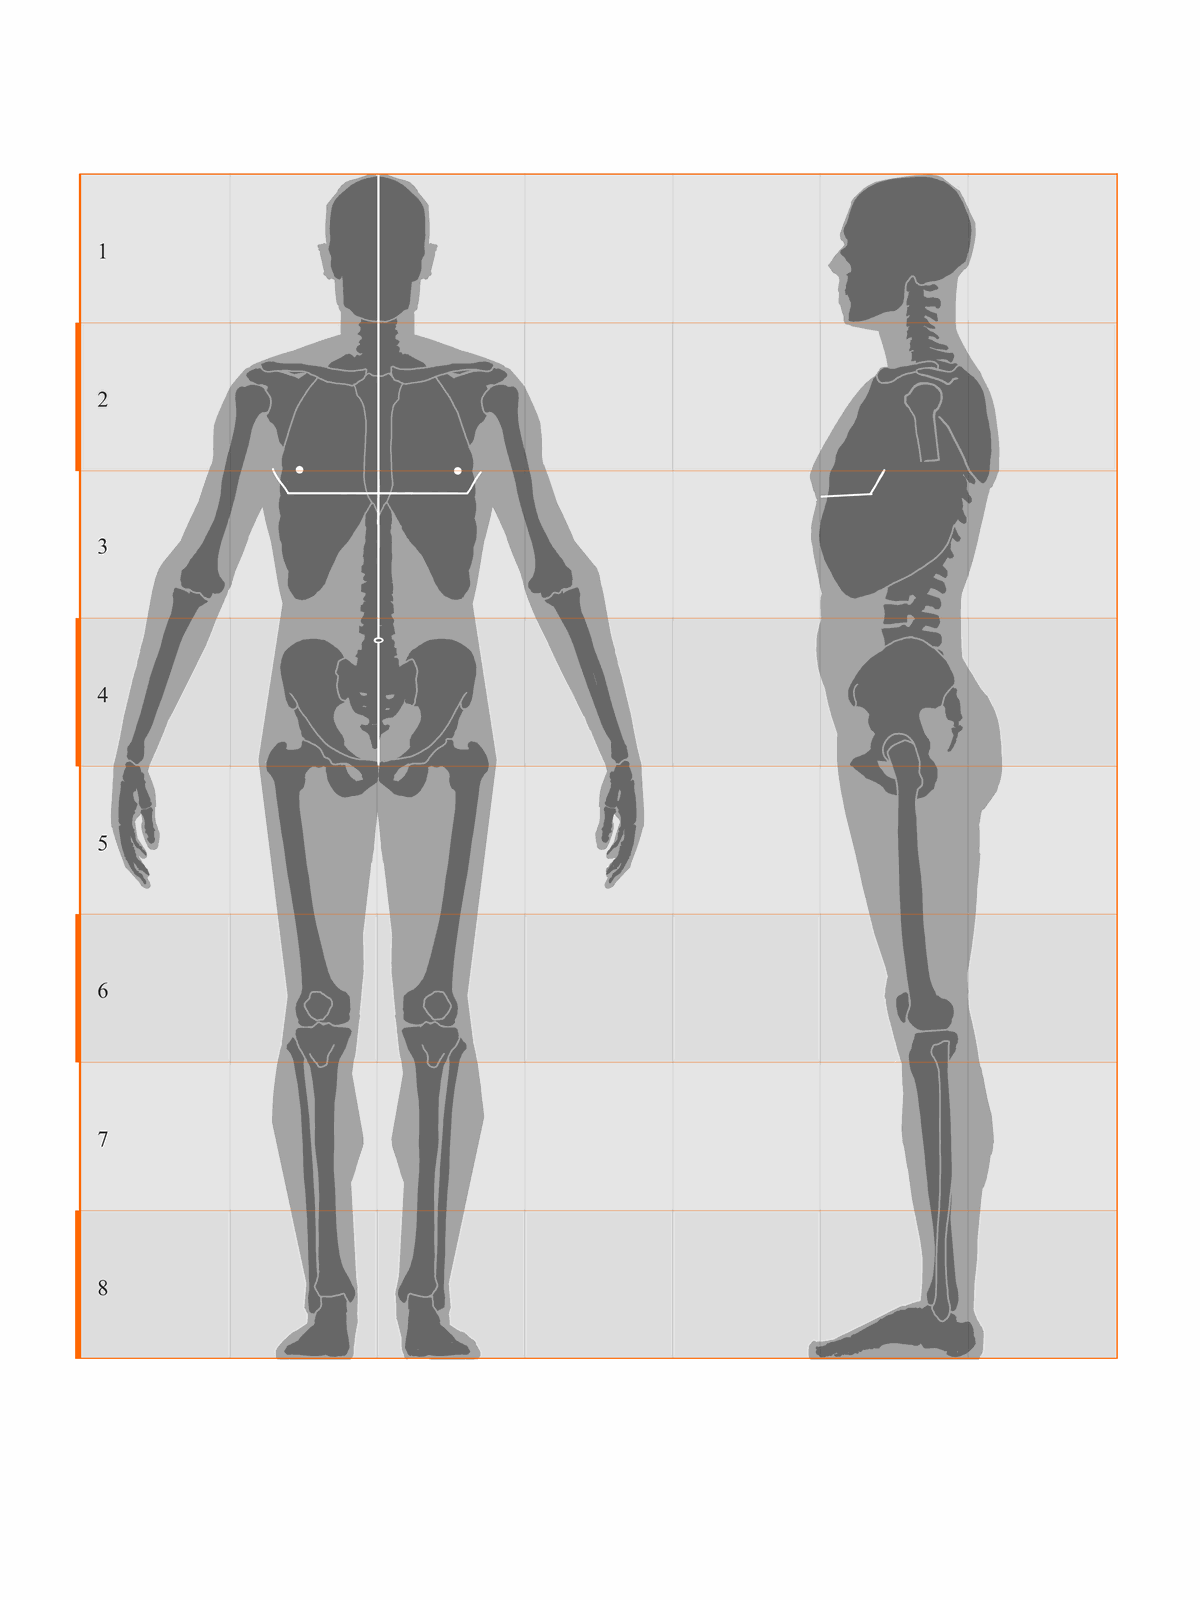 The eight-head canon, front and side — every landmark lands on a line. (Plate 12)
Eight heads, eight landmarks
Counting down from the crown, each head-height meets a feature of the body: chin at one, nipples at two, navel at three. And the fourth line falls exactly halfway — which is where most beginners go wrong.
The body divides in half at the pubic bone — not the navel.
Anchor on the navel and you’ll build the legs too short every single time. The legs are as long as the entire upper body, head included.
Other systems
Loomis breaks down the different systems of measurement, from seven-and-a-half heads to nine.
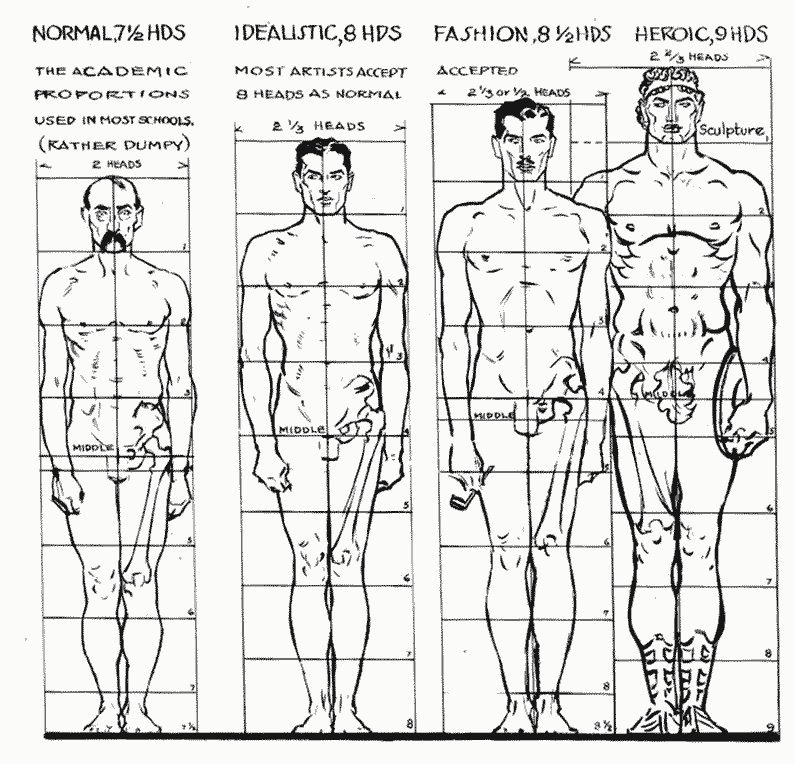 Proportions of the human body through history — how the “ideal” canon has shifted.
Gesture
I first became aware of gesture drawing from Kimon Nicolaides’ book The Natural Way to Draw. Nicolaides said the idea was to draw the action of the model — and that has generally been the idea behind gesture ever since, with a few modifications along the way.
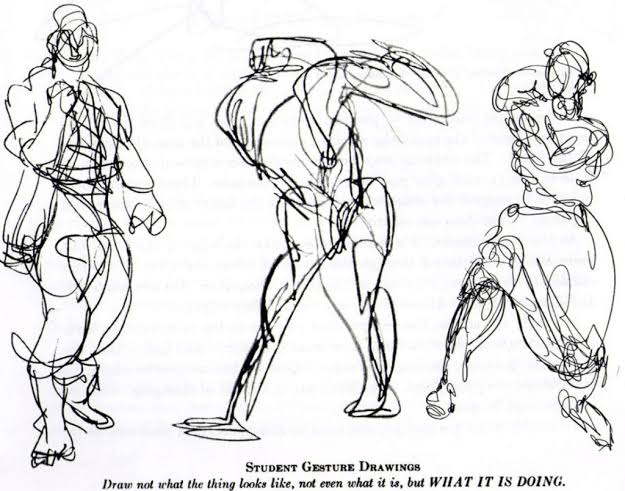 Kimon Nicolaides — gesture as the action of the model.
In the entertainment industry, gesture gets merged with some understanding of volumes to become a sort of calligraphy for capturing poses — like this drawing by Karl Gnass.
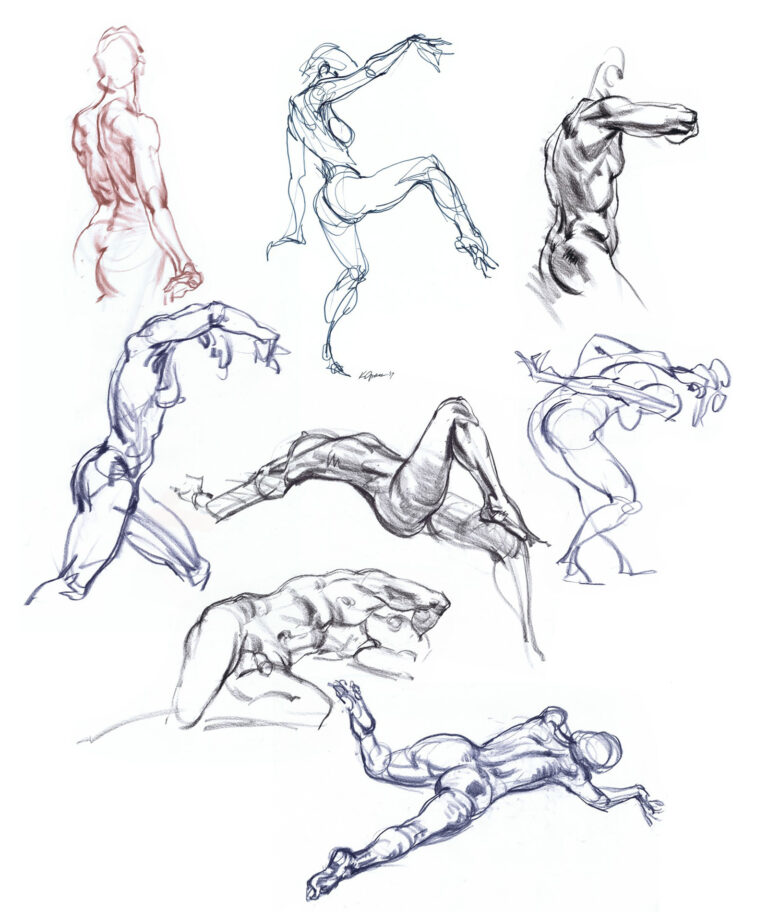 Karl Gnass — gesture merged with volume, a calligraphy for capturing poses.
You can see a less sophisticated version of that in this drawing from How to Draw the Marvel Way. There’s a center line, and you can see the movement of the pose, but it’s more codified than Nicolaides’ gesture drawings.
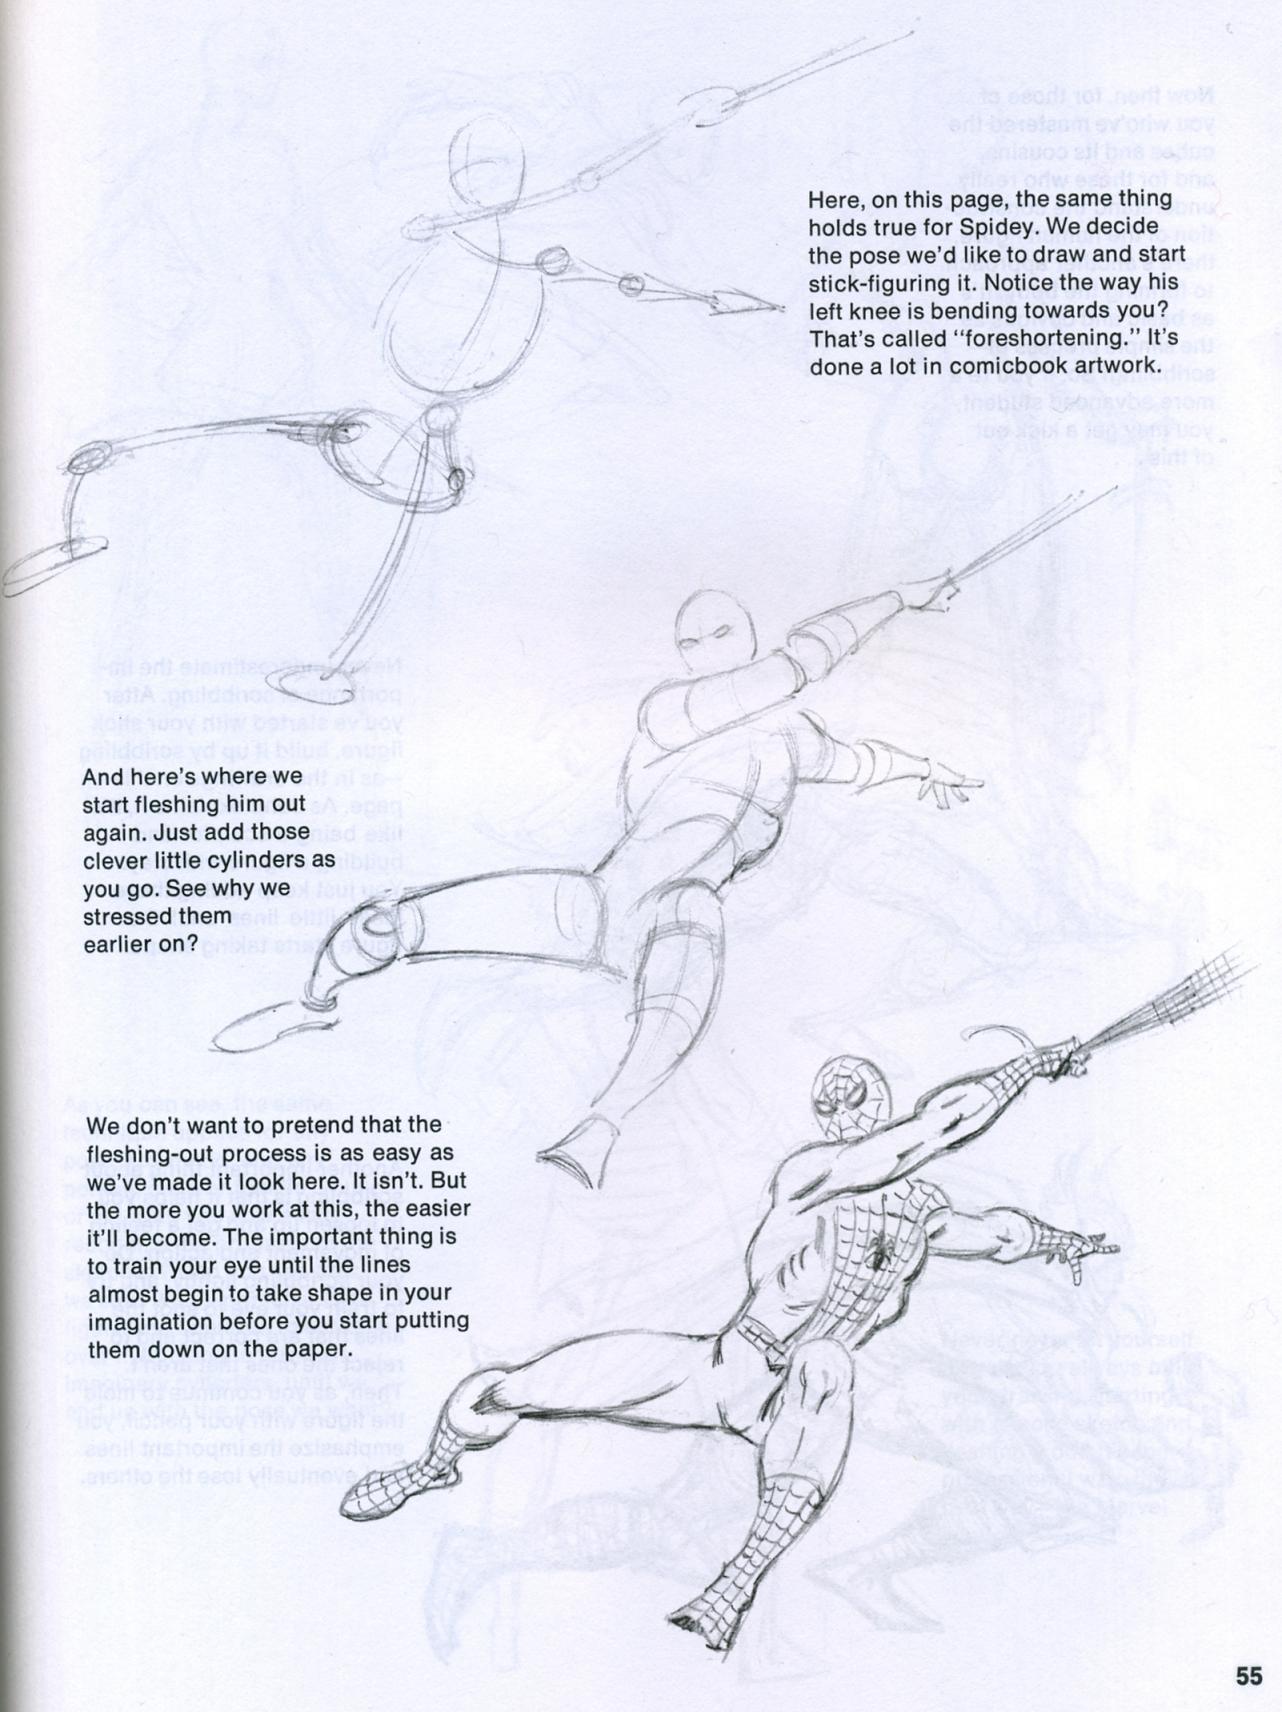 A more codified, center-line approach to gesture — from How to Draw the Marvel Way.
Volumes of the body
Once the gesture is down, the figure needs mass. Every form on the body is really a simple solid in disguise — a box, a cylinder, an egg, a wedge. Sculpt those solids first and the anatomy has something true to sit on.
The idea is old. It runs all the way back to Luca Cambiaso, the 16th-century Genoese master who drew whole figures as stacks of cubes and blocks — bodies reduced to pure geometry in space, centuries before anyone called it “construction.”
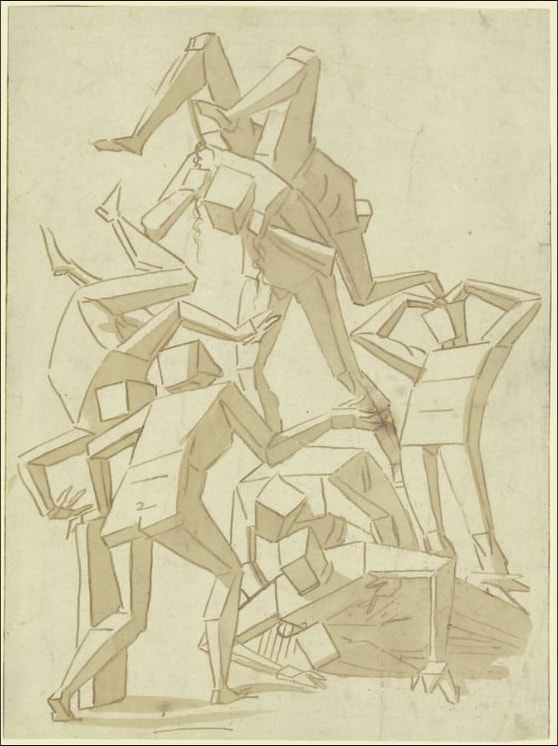 Luca Cambiaso — figures built entirely from cubes and blocks. Volume, centuries early.
We use a warmer, more usable version of the same idea — the John Buscema approach. Look at the middle figure below: the pose is fleshed out with “clever little cylinders,” the whole body built from stacked tubes and volumes before a single detail is added. (Top is the stick-figure gesture; bottom is the finish.)
John Buscema’s three stages — the middle figure is our method: build the body from stacked cylinders first.
For a cleaner look at the same principle, artistic-anatomy legend Eliot Goldfinger — in Human Anatomy for Artists: The Elements of Form — photographs mass-conception maquettes that show the whole figure as a few big, believable volumes.
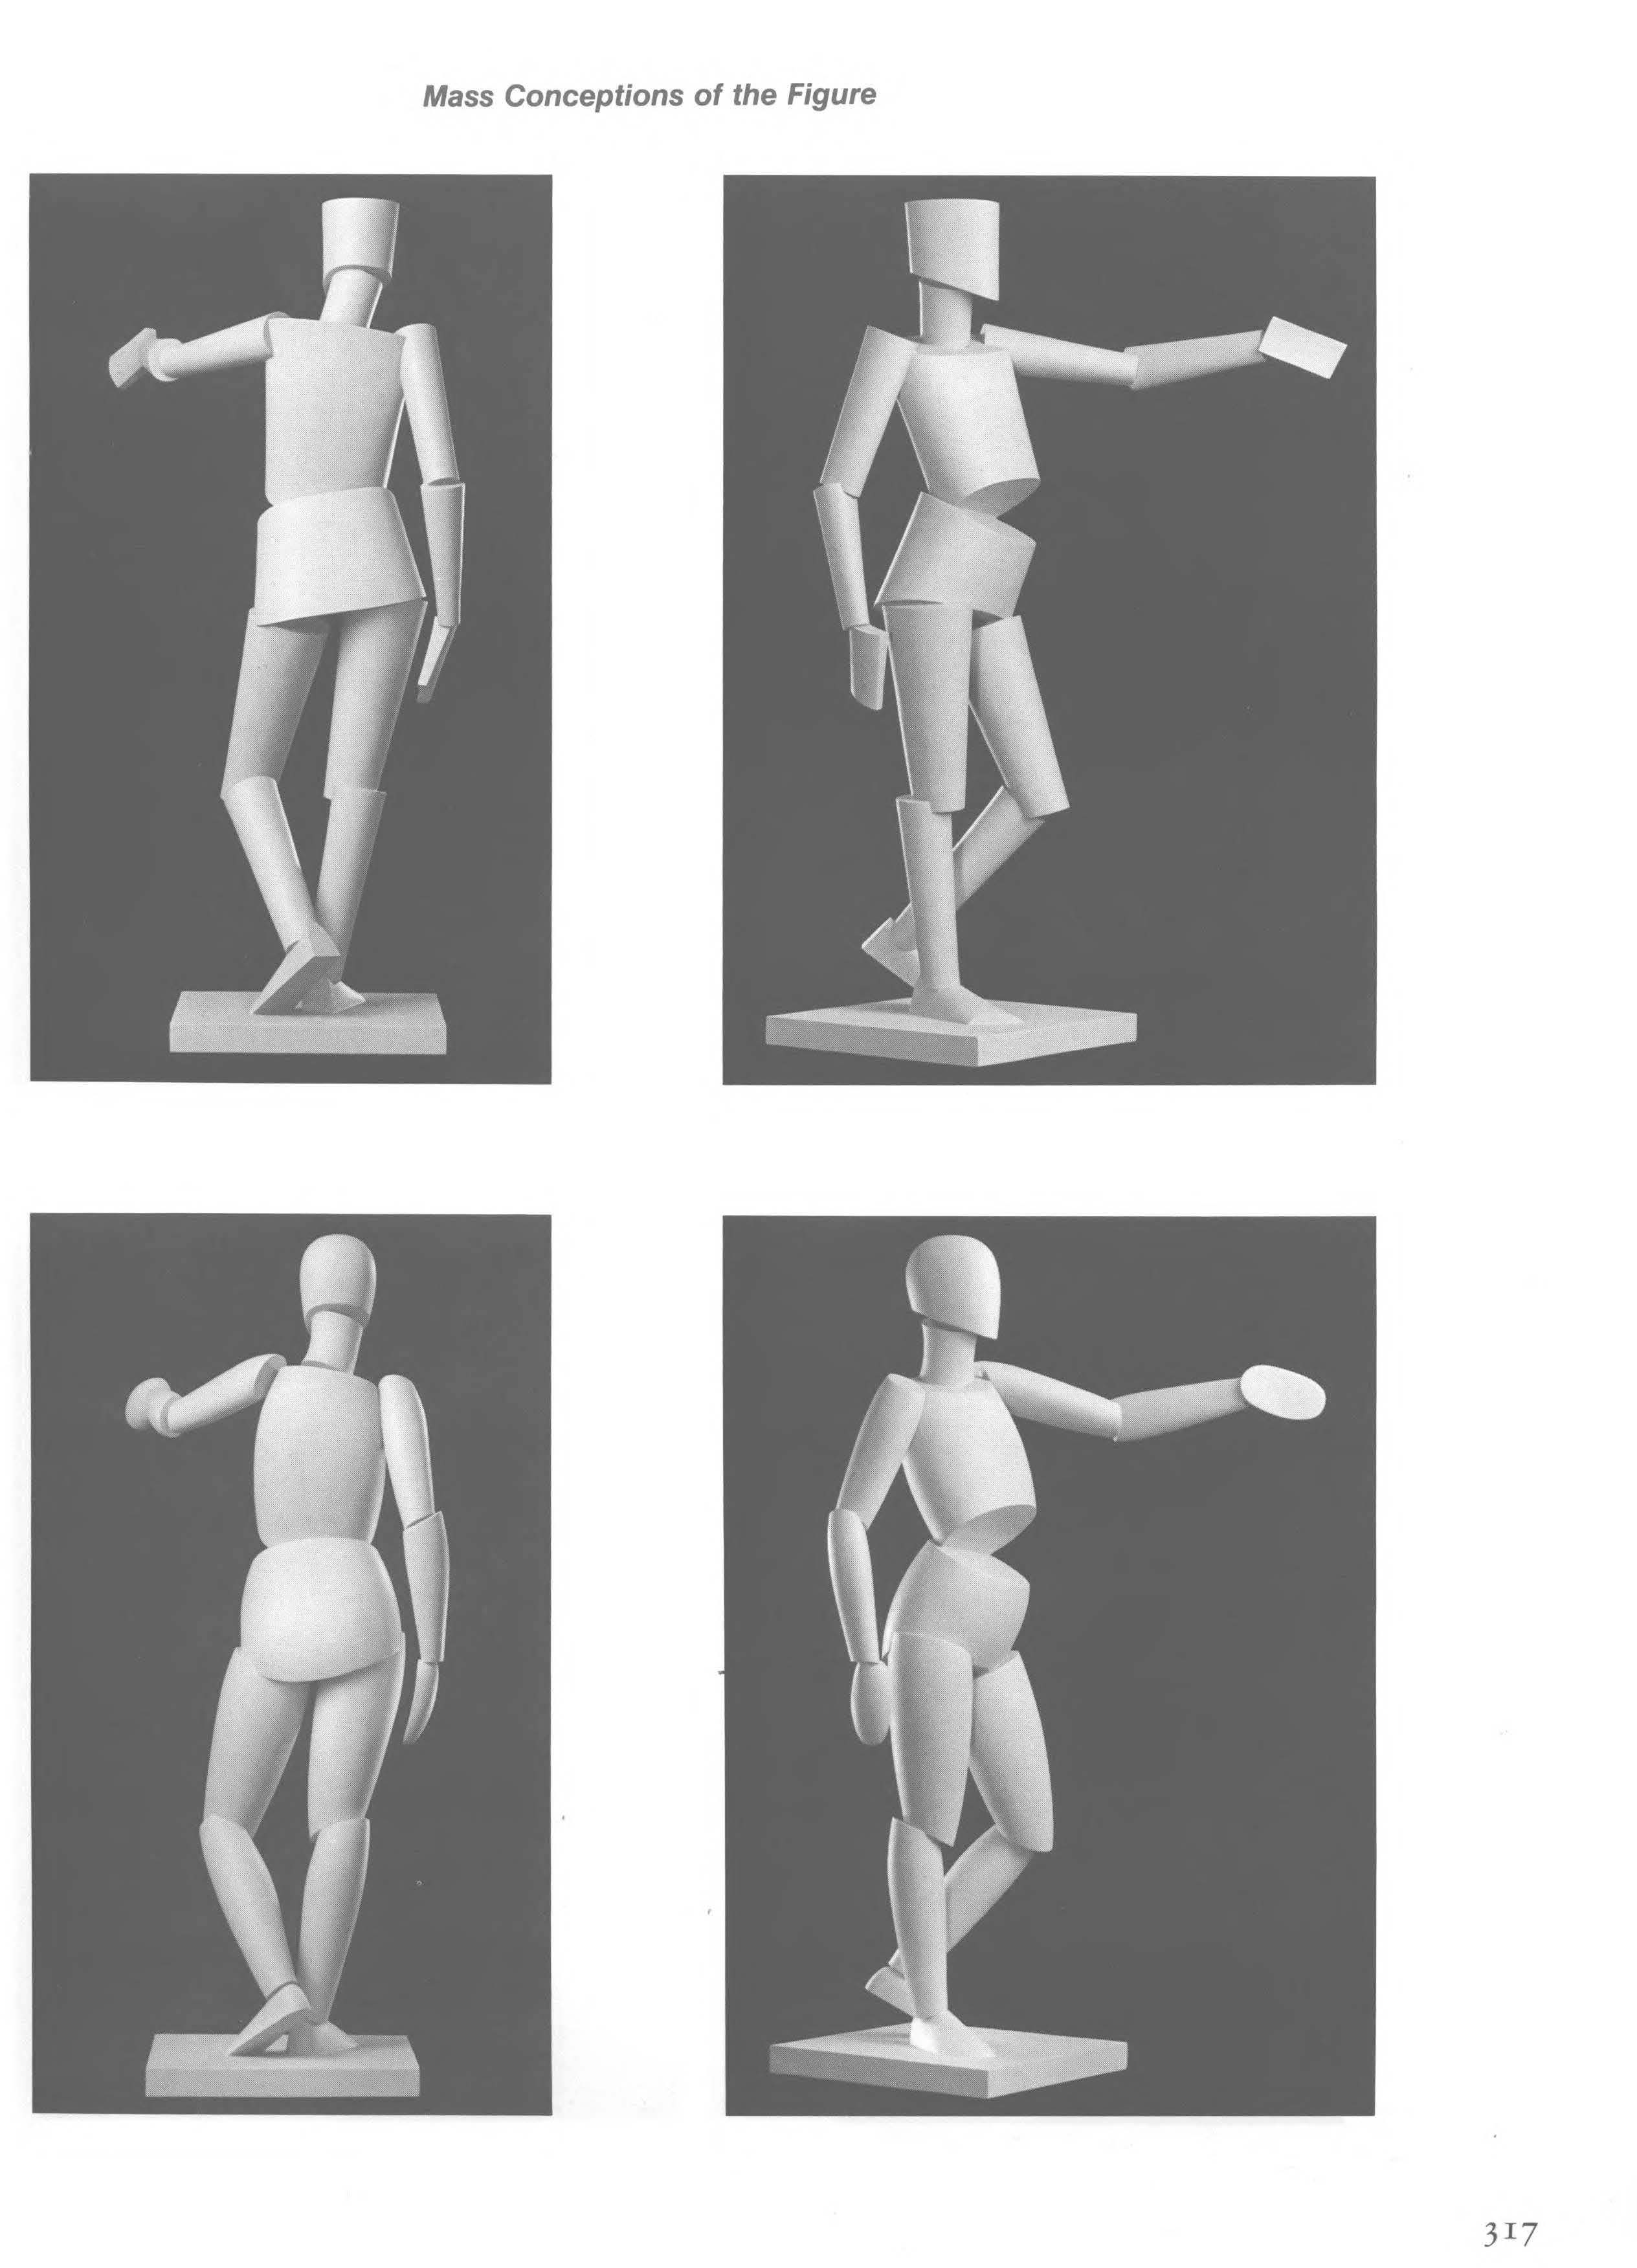 Eliot Goldfinger — “mass conceptions of the figure”: the body as a handful of simple volumes.
And this applies to animals just as much as to people — the same volume-thinking builds a horse, a lion, anything on four legs or two.
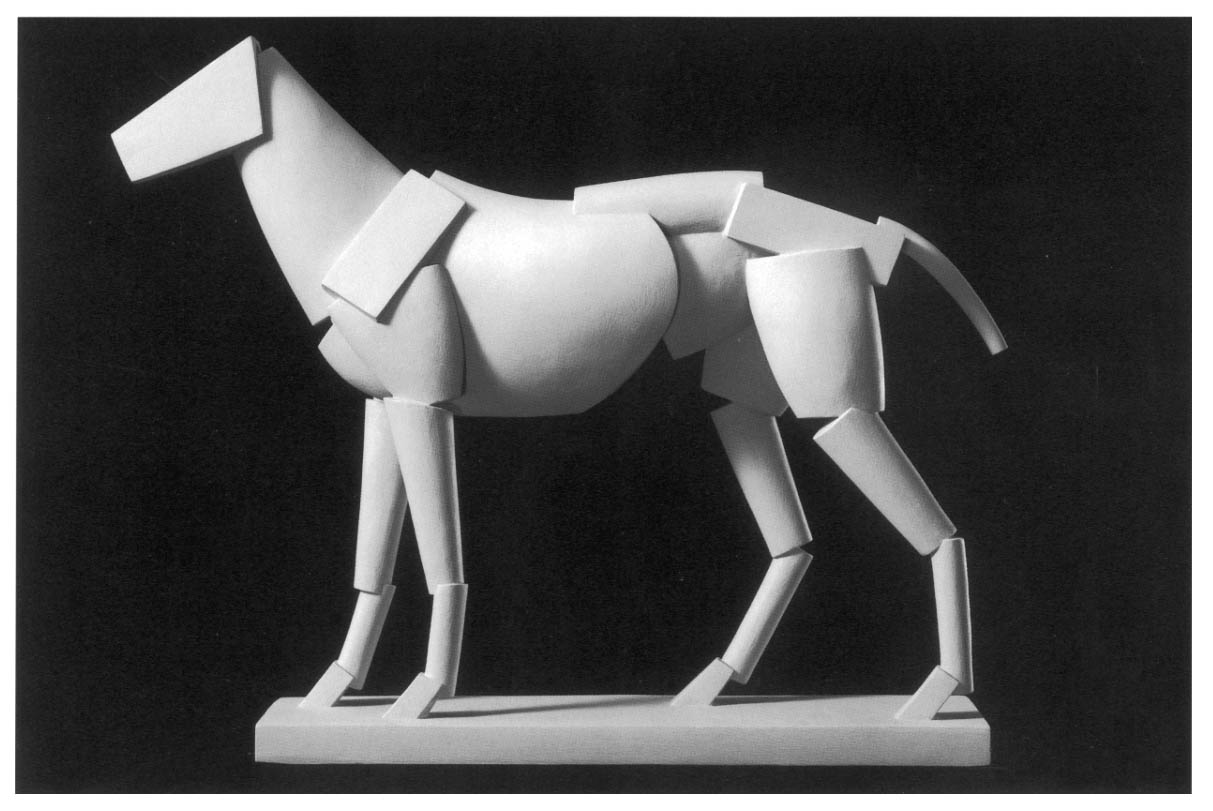 Goldfinger — the horse resolved into simple masses. (Animal Anatomy for Artists: The Elements of Form)
But it isn’t always clean, tidy volumes. In practice you often rough them in. Look at this pencil rough by Dave Dorman for his Frank Frazetta tribute: the lions and figures are scribbled in as volumes and masses — felt more than drawn — so the solidity is there long before any finished line.
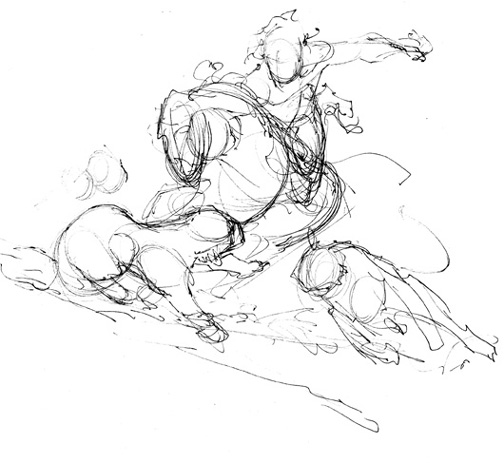 Dave Dorman — pencil rough for a Frank Frazetta tribute. The volumes are roughed in, not drawn. (davedorman.wordpress.com)
Planes and planar conception
Volumes tell you where the mass is; planes tell you how light reads across it. Every rounded form can be understood as a set of flat planes — a top, a side, a front — meeting at edges. Find those planes and the figure catches light like a carved thing instead of a balloon.
No one taught this better than Gottfried Bammes. His planar analyses turn the soft body into faceted, almost architectural form — without ever losing the life.
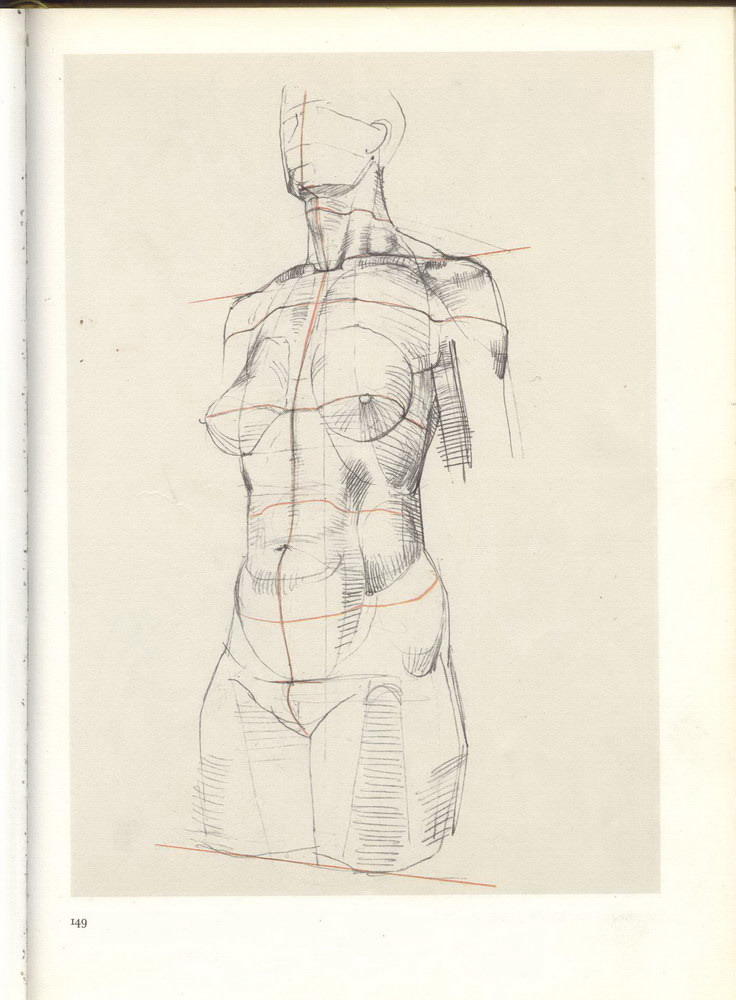
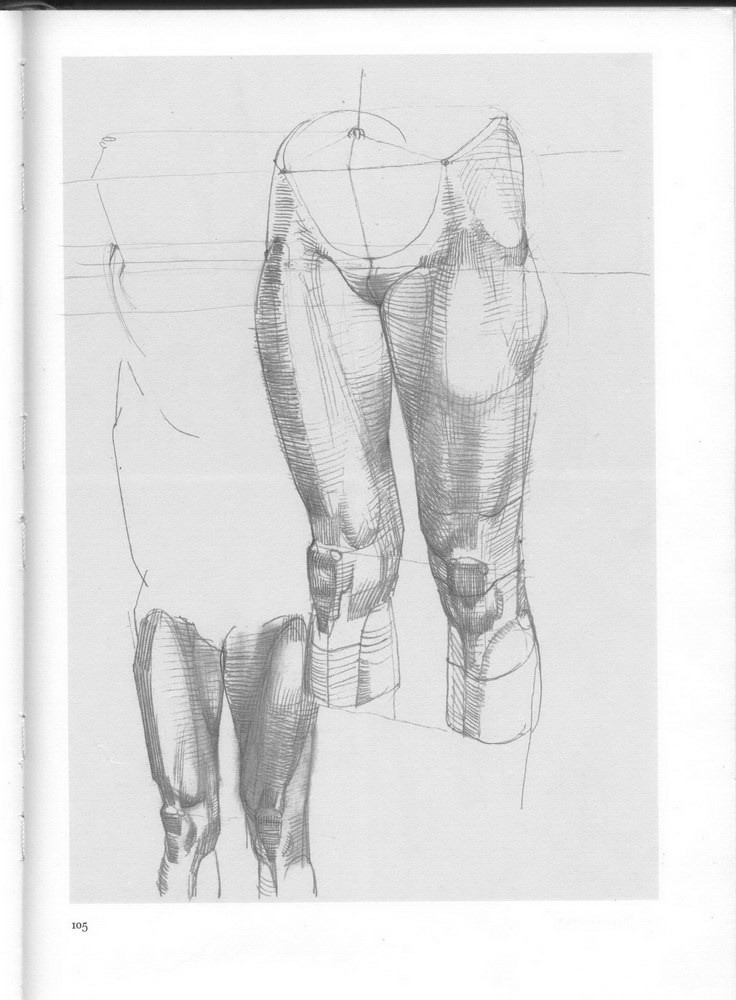
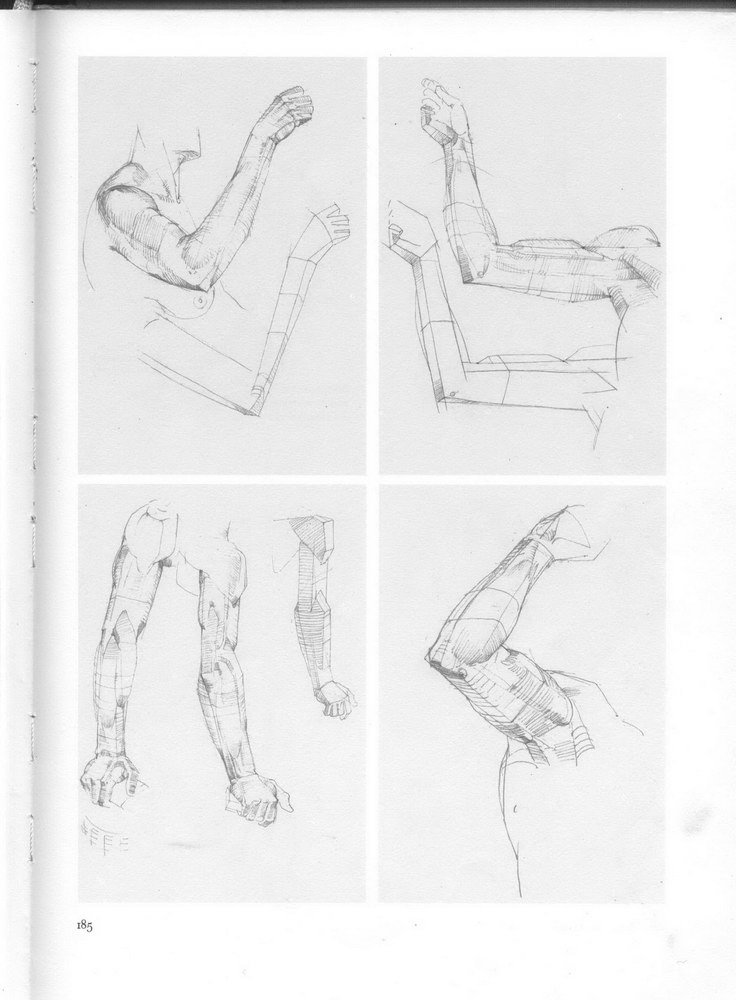
Sculpt toward planes early and your forms stay firm. Establish the big plane breaks first — then round them only as much as the light demands.
Loomis planar figures
Loomis sets out a planar figure within the eight-head proportion system.
 Andrew Loomis — the standard figure types and their proportions.
That’s the foundation: proportion, gesture, volumes, planes. Everything we sculpt this cohort gets built on these four ideas, in that order.
Self-paced · lifetime access
Anatomy for Artist
The human figure taken apart and rebuilt — every muscle built from the skeleton up in ZBrush, at your own pace, plus a live critique every month.
Start the course →Primary Forms
Get the next note in your inbox.
Anatomy breakdowns and sculpting method, sent when there's something worth sending. No noise.